- Make sure that the current work(in any of the projects) is completed and checked in
- Close the Visual studio
- Delete the local TFS folder you had mapped earlier
- Open Visual studio
- Navigate to Source Control Explorer
- Click on View
- Point to “Other Windows”
- Click “Source Control Explorer”
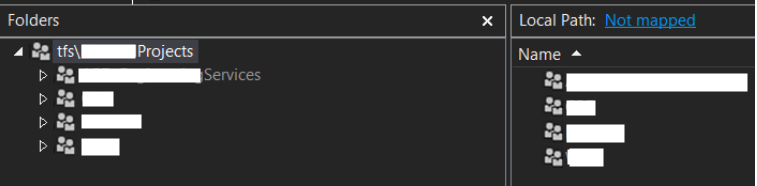
- Click on the Top node “tfs\<Collection Name>”
- On the right hand side Click on “Not Mapped” Link

- If you don’t see the Not Mapped link here is what need to be done
- Right click the collection name > Advanced > Remove Mapping..
- Right click the collection name > Advanced > Remove Mapping..
- If you don’t see the Not Mapped link here is what need to be done
- You should be able to see the following map box
- Make sure check box that says “recursive” is checked
- Click on browse and navigate to a local drive
- Create anew folder called TFS on the root of the drive
- Click on OK
- It may ask you to remove any previously mapped location, choose Yes
- Thereafter, it will prompt to download all, choose NO
- Open the project that you want to work upon and start using Visual studio as usual.